
 Review by Ron Dobrzelecki
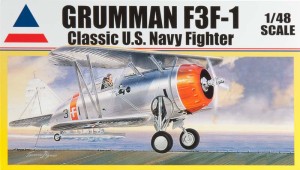
The F3F-1 It is molded in light gray plastic, comes with photo etch rigging an engine wire harness. The decal sheet covers all F3F’s squadrons that operated the aircraft, beautifully printed.
I would go to Accurate’s web site they have a step by step build on their site, follow the instruction sheet it has a couple of tips. One is the landing gear doors, open up the L shape opening on either end of the door. This makes fitting of the doors between the a frame of the landing gear easier. Lets start with the interior, follow the kit instructions it really goes together easy .One thing that I really like about their instruments panels they give decals for the instruments that go either in front or behind the clear panel, your choice! I chose the behind the panel, I think it looks more realistic. You put a drop of Parma on the panel let it dry, paint it pick off the drops: instant clear dials. Put the decals behind it, you’re done. I used the PE seat belt, glossed it then put the decal seat belt on brushed on some solve set let it work: instant colored seat belt. Looks perfact! Paint the interior Model Master non-buffing aluminum, also use it for the doped outer color. After assembling the cockpit parts trap the cockpit between the fuselage halves. Follow the kit instructions for the rest of the build. One important thing is that the upper wing goes on first, it sets the dihedral for the lower wing. Proceed with the rest of the build.
I used Model Master insignia yellow FS33538 for the upper wing color. I selected the USS WASP Gloss Black tail, blue section leader (used Extracolor true blue). After the paint had dried I decaled the model. The decals went down with no problems. The photo-etch rigging went on with no problems, but a word of warning: be careful with rigging, do not bend it. I almost had a problem when my scissors slipped. Make a note make sure which way you have the PE piece for the rigging that goes on the fuselage: part # pe92, pe93. After putting on the antenna wire I was done! What a beautiful piece. Well dome Accurate Miniatures!