
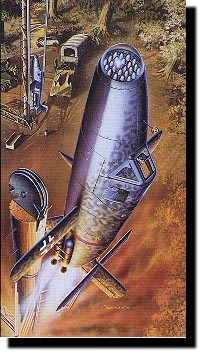
 The Bachem BA-349 Natter (Adder) was designed as a point defense interceptor. Designed for Vertical takeoff, it would launch a single attack with nose mounted rockets, followed by an escape whereby the aircraft would split into two parts to be recovered by parachute and a pilot who would bail out to fight again. The Natter is represented by both vacuform kits, as well as part of an injection-molded set by HELLER and this month’s review subject by DML/DRAGON.
DML/DRAGON Bachem BA-349 Natter
Type: Injection-molded plastic
Origin: Hong Kong?
Appearance: gray styrene, two piece canopy, large single sheet instructions, small fret of stainless steel photo etch loosely packaged in a heat sealed plastic bag w/ decals in a cardboard box
Assembly:
Considering the basic simplicity of the real Natter, DML has done an excellent job with the interior. A mix of plastic and photo etch actually looks good here. My complaint is the ridiculous usage of stainless steel for the photo etches! It’s extremely hard to cut and bend, and for the life of me, I can’t understand why they didn’t use brass. The nose assembly goes together well and attaches to the forward fuselage. You’ll have to do a fair bit of filling and sanding to blend it all together, but the end result is worth it. Add the wings and move on to the next step.
DML has provided two versions of the Natter, one with a launch tower and (the object of this review) with a detachable rear fuselage exposing the Walther rocket motor. This is likewise a combo of hard to bend photo etch and plastic. Part B-1 is delicate and needs care when removing it from the sprue. I broke mine but it was relatively easy to repair. This assembly will benefit from super detailing using tubing and a good reference source.
Now its’ back to the forward fuselage again. Add the simple instrument panel to the windscreen and some more photo etch to the canopy proper. Considering what you’ve done with the interior, it seems a shame not to display the canopy open. The ring and post sight should be added after painting and decaling.
A nice touch is that DML supplies a cradle to hold your model. Build it and rest the front fuselage on it for now.
The rear fuselage consists of two halves, a rocket nozzle, horizontal stabilizer and fin/rudder. Build and paint these and start on the rocket boosters. You get four of these with angled nozzles. These are glued in pairs on the rear fuselage. There are no locator marks of any kind, so once again, use the painting guide or a decent reference to assist with placement.
For the finals, DML supplies two ground crewmen, one working on the engine, and the other poised to load an R4M rocket in the nose. If you use him, drill a hole in one of the compartments of the honeycomb so at least he won’t look foolish trying to load a loaded gun (so to speak). DML also supplies a round base to display this little vignette. A very pleasant change from the gear up/gear down alternatives we are usually given. I used a piece of Verlinden 1/48Th scale tarmac to cover mine, but if you love groundwork, just go to town on it.
Painting and decaling:
The scheme given (overall hellblau with dunkelgrun squiggles) is one that I’ve seen in most of my references. However, “Natter and other German Rocket Projects” has a color illustration of a striking yellow Natter, with a black radiating sunburst and black circle on one lower wing. This pattern was used to determine how the Natter rolled on takeoff. The decals consist of numbers for upper and lower wing (serving the same tracking purposes as the scheme above) and some T-stoff and C-stoff markers. I haven’t seen any photos of Natters with wing and fuselage crosses and swastikas on the tail, but it might have been done and considering the state of the Reich at this point, I honestly doubt that accuracy was on everybody’s mind.
Summary:
One again you get a chance to build an interesting prototype that actually flew! The larger scale, combined with the overall small size of the real thing won’t eat up a lot of shelf space. The inclusion of a display base (what? No acrylic cover?) is a bonus. For those of you with more room, the launching tower is calling you.
Review by Tom “the Bee Master” Stead