
 Review by Tom Stead
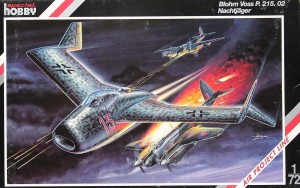
Manufacturer: SPECIAL HOBBY
Scale: 1/72
Origin: Czech Republic
Type: Limited run gray injection-molded plastic with photoetch, decals, vac-u-form canopy and single sheet instructions.
Hi gang! This months’ feature is a twin spin from the Luftwaffe. Yes, those shipbuilders from Hamburg, Blohm und Voss, designed quite a few odd aircraft as well. This month we look at two bat-wing birds, the p.212.03 dayfighter and the three-seat p.215.02 nightfighter. Once again Special Hobby gives us both a challenge and some nice additions to the hobby shelf.
Comments:
Both of these kits are what we have come to expect from S.H. Thick, clunky moldings with huge attachment points, tons of flash and ill-fitting parts. No alignment aids of any kind. The wings have ejector pins that need to be trimmed off and the wing halves are so thick that you need to sand them to even approach scale thickness.
Assembly:
1) The day fighter has a floor with a curved surface to represent a jet engine. Attach a seat, rudder bar and stick and this part is finished. Use a decal on the instrument panel, since what is provided is pretty poor. Glue the bulkhead and jet exhaust into one fuselage half and start test fitting and sanding. This’ll be good practice for when you install the cockpit assembly. The jet inlet assembly is shown in this step. Glue it to the nose (part 6) and start trying to figure out how you’re going to hide the nose weight needed to prevent tail sitting. Similar fun and games await you on the night fighter. Here you have some photoetch to play with (more specifically, seat belts and rudder pedals.) The guy in the back will need some spares box help. As with the day fighter, the fit stinks. Sanding and test fitting are the order of the day. The tail assembly gets two jet cones added and requires quite a bit of sanding and filling. The main blessing is the shelf in front of the forward bulkhead. You can easily glue enough weight (I used tire balance weights) to keep the nose gear down. When everything finally fits, close up the fuselage and glue (and sand, and fill, and sand….) the nose intake.
2) For both of these beasts glue (after sanding the inner surfaces) the main wings together. The day fighter’s fin/rudder assemblies are single piece, while the larger nightfighters’ are in two thick halves. Glue sand and fill the wing assemblies and paint them now while the handling is easy.
3) The next major step is the wing/fuselage assembly. Since you have no help here, I suggest pinning and drilling or cyanoacrylate and prayer. I chose the latter and it worked well for me. As before, filling and sanding are necessary, but the “fit” here is the best part of the kit. Flip ‘em on their backs like a couple of dead cockroaches and add the landing gear. You are fortunate enough to have a locator for the day fighter’s nose gear. So far as the rest of the gear goes, you’re on your own. There is absolutely no detail in the wells, so consider it a blank slate for detailing. The day fighter has a small belly plate (test-fit and sand) to divvy up the main gear. Use the painting chart to help you locate the main gear legs. Large, clunky and overly thick landing gear doors complete the assembly.
4) Other than some photoetch parts and aerials, the vacuform canopies (NO SPARE!) are added after finishing. The nightfighter has a poorly done twin gun dorsal turret that is added at this time.
Painting & decaling: Each kit comes with two color schemes and Propagteam decals. The day fighter has a Lichtgrun/Dunklegrun splinter over Lichtblau undersides or solid Braunviolett over natural metal unders with a red nosepiece. The nightfighter gives you a Graugrun mottle over an overall Lichtgrau body, or a Grauviolett/Graugrun splinter over all-black undersides. As I said before, Propagteam decals. In other words, thin, delicate and a total pain in the butt to apply.
Being a European company, only swishstakas are provided.As always, being luft ’46 type projects, there is plenty of room for different paint schemes, with only imagination and common sense being your guides.
Summary:
What can I say? Despite the hard and oft times frustrating work, I like ‘em. Not for the beginner by any stretch of the imagination, but excellent for the intermediate modeler. Marvin Banka did a dynamite job on the dayfighter (as usual) and added four X-4 missiles under the wings! As I said, the sky’s the limit!