 Manufacturer: Hasegawa
Kit No. 9389
Scale: 1/48
Price: $45.00 USD
Medium: Injection-molded plastic, Cast White-Metal Gear, some photo-etch
Review by Bob Hester
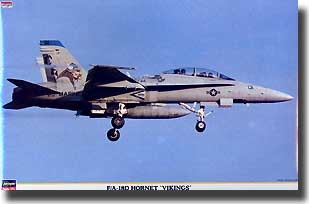
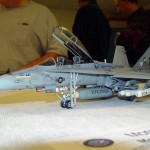
Having always loved the Hornet, colorful scheme of the VMFA(AW)-225 “Vikings” caught my eye; when Hasegawa came out with a limited-edition 1/48 kit with this scheme, I had to have it! Crisply molded in light grey plastic, this kit is a beauty.
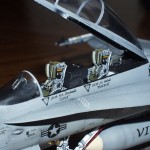
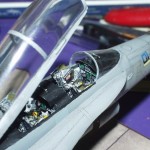
Assembly was fairly straightforward. I started with the cockpit; detail is excellent, but a bit sparse, so I replaced the kit tub with a Black Box F-18B set which I customized a bit with a little help from Dave Roof . I had no difficulty fitting the resin cockpit into the front fuselage. Extra care should be taken with the HUD assembly; Hasegawa provides a photo-etch part which forms the frame, and must be folded correctly – it doesn’t leave much clearance from the front windscreen.
The nose section is molded in separate parts from the fuselage, but with a bit of care, lines up cleanly. Some extra care was needed around the engine intakes, which are sub-assemblies in themselves – it’s easy to get them out of alignment (which I did), resulting in a good bit of puttying and sanding. Test-fitting here would be a good idea.
Wing assembly was a bit more tricky; care should be taken when assembling the flaps. The kit provides optional parts for positioning them raised or lowered (I set them lowered). If the flaps are not set correctly, they will fail to connect with the actuators (4 per wing) and you will be left with noticeable gaps. Once the flaps are in place cover strips are provided for the upper wing surfaces – here again, alignment will be dependent on proper positioning of the flaps.
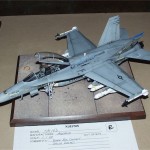
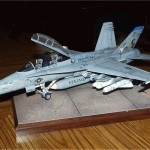
The cast-metal landing gear was especially nice; the level of detail is excellent and there were no fit problems mounting them in the wheel bays. Because they are metal, they are very forgiving when getting them aligned. Provided they’re installed to identical depth, any slight misalignment can be corrected by gently bending them to the correct position. I used a crystal lens from Tarmac for the landing light on the front gear – it is far superior than the kit-provided clear part. As might be expected, the boarding ladder photo-etch was a bit tricky, but with care I managed to position it properly.
I used Model Master II enamels for painting; the standard Dark and Light Ghost Gray. I airbrushed a couple of light coats of Future before decaling, then did an oil wash (a bit heavier than usual) to bring out the detail. Highlights were brushed on with ground chalk pastels, then a final airbrush with a 50/50 mix of Testors Gloss and Dullcoats to seal everything.
I had heard that the kit decals are not entirely accurate, so I used the “Vikings” set from Dave Roof’s Orion Decals – a beautiful bit of work they are. Included with the set were not only the beautifully rendered “Vikings” artwork, but both Low- and Hi-viz stencils and warning markers for the ejection seats. I did have some problems with the stencils – some of the low viz markings tended to disappear against the Dark Ghost Gray background. I was able to come up with nearly identical stencils (in black) from spares (and from pillaging a couple of other kits). In hindsight, this might have been a perfect time to use my laser-jet printer to make my own – something I’ll keep in mind when I get around to building those kits which now have missing stencils!
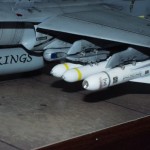
Since the kit comes with no weapons, I used ordnance from Hasegawa Weapons Sets “B” and “C” – AIM-9 Sidewinders, AGM-62 Walleyes (with Tarmac crystal lenses), and Rockeye Mk. 20’s.
All told, it was a fun kit to build and I highly recommend it to anyone seeking a decent F/A-18D.
Sept 2002