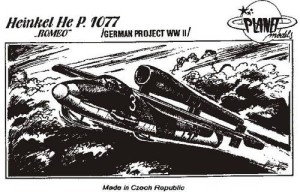
 Planet models P.1077 Romeo (1/48th scale)
Type: resin with vacuform canopy
Origin: Czech republic
Appearance: tan resin, single sheet instructions, loosely packaged in a heat sealed plastic bag w/ Propagteam decals in a cardboard box
Review by Tom Stead
Assembly: extremely straightforward and simple. The sequence should be divided into 2 and ½ steps.
1) Forward fuselage and cockpit
2) Rear fuselage, wing, tail & pulsejet
2 ½) landing skids and canopy
Comments: the forward fuselage has an extremely simplified interior (seat, stick, resin instrument panel & rudder bar) your best bet is to detail this with a True Details photoetch kit for the Monogram ME-262. This’ll give you a much better instrument panel, seat and shoulder belts, rudder bar and side consoles. Once this is glued together start test fitting to the rear fuselage. These parts are keyed (thankfully) but the forward fuselage plug must be sanded for a snug fit. Be warned that the upper nose section of the forward fuselage fits poorly and requires considerable sanding and filling.
Additions to the completed fuselage are the wing, pulsejet and 3-piece tail. The wing and tail require a little filling and sanding, but are generally good fits. Sad to say the pulsejet needs help. Get out the drill bits and start hollowing out the front and rear. Paint the interior of the exhaust burnt metal. Since I wanted to do considerably more to the bare front inlet, I added the shutter assembly from the Tamiya V-1. Note that a lot of careful sanding is required for a snug fit. I also added a fuel line made from solder to join the engine to the fuselage fuel tank. The canopy and landing skids can be added after painting and decalling.
Painting and decalling: generally wide open (prototype, remember?), But since this is a late war prototype (Luftwaffe 46) there are three likely combos (all with hellblau undersurfaces):
A) Light or olive green and dark green
B) Dark green and black green
C) Gray-green and gray violet
Take your choice of hard edged or soft edged splinter, with a slight mottle along the sides.
The decals are typical Propagteam, extremely thin and delicate and most unforgiving. If you want to try something different, get a 1/48th scale sheet of late war aces and add some personalized and kill markings. I think a tulip nose could set this puppy off pretty good.
Finals: the canopy (no spare), requires test fitting, so be careful with your cutting. After painting, a dip in Future floor polish gives a hard, clear look to show off the interior. I chose to display my model on the handling trolley from the Tamiya V-1 kit.
Summary: a somewhat pricey kit of an interesting (if unbuilt) wonder weapon. Bailouts would have been dangerous with that engine inlet overhead, and landings hardly less so. This kit (with the qualifications in the review) is recommended for :
A) Luftwaffe modellers
B) Advanced beginners who want to get their feet wet with resin
C) Anybody looking for the unusual.
