
 Review by Bob LaPadura
Pros: Finely executed details, unusual subject, very reasonable price
Cons: Some part placement instructions vague &/or confusing, no decals or figures
Highly recommended to anyone with intermediate skill and some experience building Armor.
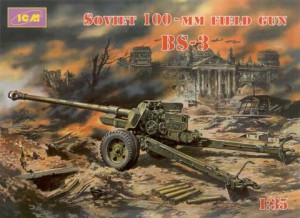
The 100-mm BS-3 was an outgrowth of a program to create a mid range artillery piece with transportability, good field performance, and a good anti-tank capability. This was the weapon which was originally intended for the JS-2 series of heavy tanks, but due to design and production delays, the larger caliber 122-mm gun was used instead. This gun eventually found its way into the T34 derived Su-85, which was then renamed the Su-100. The gun entered service in August of 1944, and has been used extensively by the Red Army and other Soviet client states. It’s still being used in various border wars around the globe. The gun fires a variety of ammunition, from high explosive, to anti-personal and anti-tank. The kit is supplied with three different shells, but unfortunately, no description is given as to which type is which. The kit can be purchased for less than $10.
The kit represents a towed version with conventional split trail arms, and can be positioned in either the towed or firing configuration. The kit does not include any figures, so if you want to set the gun up in the firing position, you will need to go out and pick up some Russian figures, separately. The kit consists of a surprising 124 pieces on two sprues. The plastic is of a more conventional light gray, as opposed to the “toy solder green” of some of ICM’s other kits. The parts possess very fine detail, some being the smallest I’ve ever seen molded in conventional styrene. There were no flash or sink marks evident, and no ejection pin marks. A parts map is included on the instruction sheet, as well as a brief history of the gun, a paint guide listing Testors and Humbrol colors and two four view line drawings of the gun in the towed and firing positions. Construction is broken down into nine steps, with part numbers prominently listed along with paint colors. Unfortunately, there are no written instructions to go along with the drawing, and in some cases, the parts placement can be a bit confusing. I had some difficulty determining the correct placement of the eight small parts that make up the sight. Take your time and study the instruction sheet, carefully!
Before doing anything, make sure to wash the parts thoroughly. For whatever reason, the Eastern European and Russian producers use a lot of release agent during the pressing process. I filled a basin with soapy water, and gently scrubbed the parts with a toothbrush. Afterwards, I rinsed the sprues off and left them to dry. When dry, I noticed that there was still some oily residue left, so I repeated the process.
The first, most obvious thing you will notice is the length of the gun barrel. These are the two largest parts of the kit, and were molded with absolutely no warp, whatsoever. The barrel halves have no positioning pins, so careful alignment is a must. One word of caution, even though the kit can be built in either the towed or firing position, all the instructions show the kit as configured in the towed mode. This is where some experience with building split trail arm guns can come in handy. The main differences are the placement of part B16, which in the firing position would be folded forward on the left trail, and the placement of parts A24 and A26, which are either placed in the holes as indicated, or the second hole located slightly to the rear and outside on parts B19 and B20. If you extend the trail arms, you will see how the outer holes line up with the holes on parts A28 & A29. If you have doubts as to how you want to display the gun, leave off parts B16, A24 & A26 until the gun carriage is complete. You can then decide how you want to position the legs, as long as you haven’t cemented the trail arms to the main axle!
I found the placement of the two storage boxes on the outside of the gun shield particularly troublesome. Use the line drawings in the instruction sheet and the color drawing on the box for assistance. Take especial care positioning parts A37 as these are the mounting points for the two arms holding the gun shield to the gun carriage. Use some slow setting glue, or better yet, glue parts A37 to parts A49 first, then position the gun shield flush against the two attachment points at ends of parts B6 & B42. This will give you the correct angle and height of the shield, then carefully place the upper supports (A37 attached to A49) between the attachment point on the gun carriage and the inside of the gun shield. I know, it sounds a lot more complicated than it really is. I left off the two shovels and the pick till after the model is painted.
A prominent data plate is evident on the box art on the outside of the breach guard. Unfortunately, this hasn’t been included. I plan to rummage through my spare decals to come up with something similar. No other markings are evident. The gun will be painted with Testors “Russian Armor Green”, the four tires with Floquil “Weathered Black” and the sights with Floquil “Grimy Black” with the lenses picked out with silver over coated with Tamiya “Clear Blue”. I’ll then weather it with a dark wash of Future and ink, and dry brush with lightened Russian Armor Green (about one part green to 10 parts white). I hope to position the gun on a base, in the dug in, firing position.
Any difficulty aside, I am very happy with this kit. The model builds up to an accurate scale representation of the BS-3. I haven’t scaled it out yet, but it certainly has the imposing look of a massive, Russian field piece! I would recommend this kit for anyone with limited experience building armor kits. The main thing is to take your time, study the instructions, and remove and position the parts, carefully! I guarantee, if you drop some of the smaller parts, you will NEVER find them. The quality of the kit is certainly on par with DML, and not to far behind Tamiya. The kit took me about 15 hours to build, mostly due to its complexity and not any clean up or construction problems.
I look forward to seeing what ICM has in store for us in the future!
Happy building,
Bob LaPadura